How to Make a Portable AC Unit at Home
Homeowners are increasingly turning to homemade air conditioners as their preferred cooling solution. These DIY air conditioning units offer greater flexibility and convenience while being highly affordable and easy to create. Moreover, a homemade air conditioner can be a real lifesaver when you find yourself in need of relief from the scorching heat, especially if your primary home or office air conditioning system is malfunctioning or has broken down.
Understanding the Basics of Air Conditioning
One component of a central heating and cooling system that transfers heat energy from the exterior of the house is an air conditioner. An air conditioner distributes cool air through sheet metal ductwork by drawing warm air from within, eliminating its heat, and replacing it with cooler air. Additionally, depending on the model, it can help curb the humidity indoors.
On the other hand, central air conditioning systems in many cases, may appear as the logical choice compared to a portable air conditioner because it offers the most efficient cooling comfort However, this isn't always the case, though, as expensive central air conditioning machines aren't designed for compact areas that are walled off from the rest of the home. In this situation, a portable AC unit would be helpful.
Gathering Materials and Tools

These are the supplies and equipment needed to make a portable homemade air conditioner unit at home. As you can tell, everything can be found at your local department or hardware store
- Cooler.
- Drill.
- Skill Saw.
- Permanent marker.
- Duct tape.
- Battery-operated fan and charger.
- Ice.
- Two PVC elbow pipes with a 13-centimeter (5-inch) diameter.
Create a DIY Homemade Air Conditioner: Step-by-Step Guide
Having acquired your materials, you’ll then follow these instructions for building your homemade portable AC unit:
1. Make the Cooler Ready
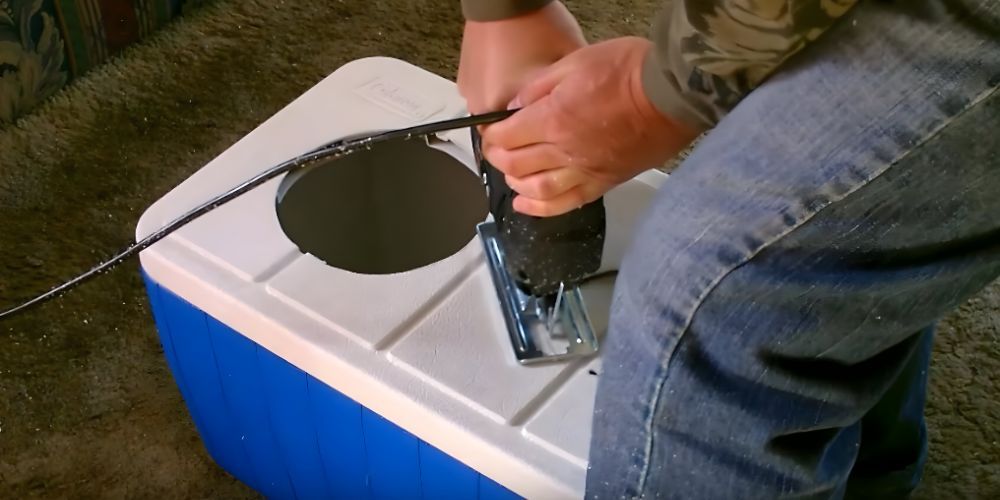
Mark the Cooler Lid: Start by tracing the shape of your cooler's fan in the center of the lid. Additionally, use a permanent marker to draw holes for the vents at each end of the cooler. These markings will serve as your cutting guides for the subsequent steps.
Cutting the Openings: To make room for the PVC pipes and the fan, carefully cut along the marked lines. A skill saw is an ideal tool for this task, ensuring precise and clean openings for your homemade air conditioner.
2. Installing the PVC Pipe
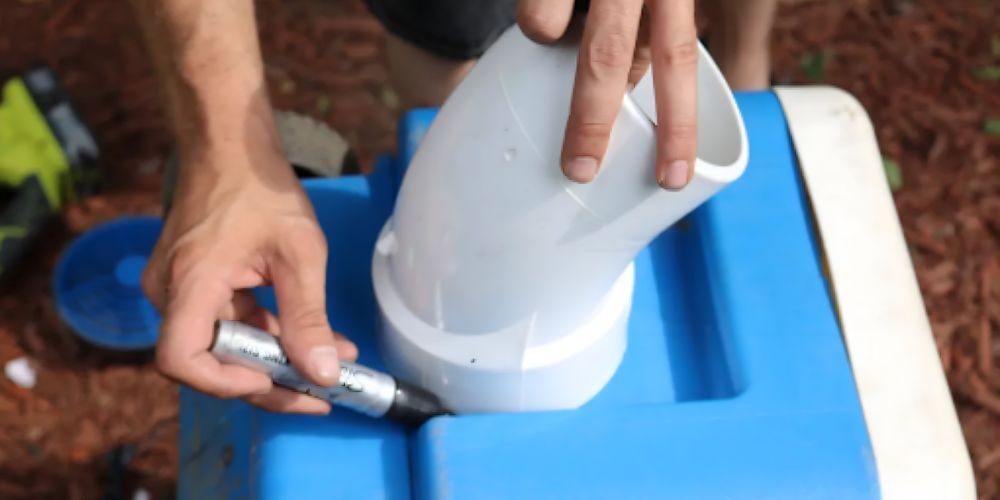
With the pipes pointed upward, insert the PVC elbow pipes into the holes you just made. Duct tape the edges of the pipes to hold them in place.
3. Setting Up the Fan:
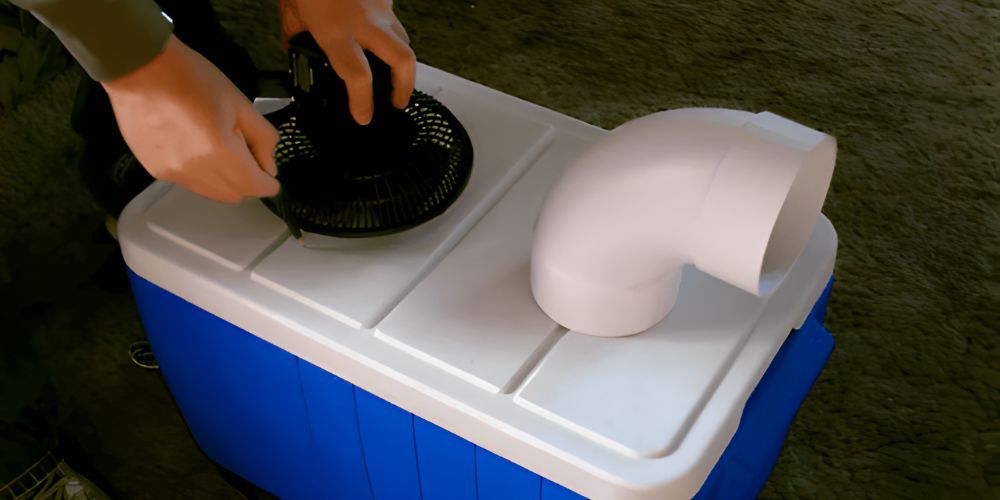
Next, place the fan inside the cooler while aligning it to the hole. Make sure it is firmly in place and pointed in the right direction so that air can be blown out of the cooler. Place duct tape around the corners to keep it in place
4. Creating the Cooling Mechanism

Then fill the cooler with ice and close the lid.
5. Operating the Portable AC Unit
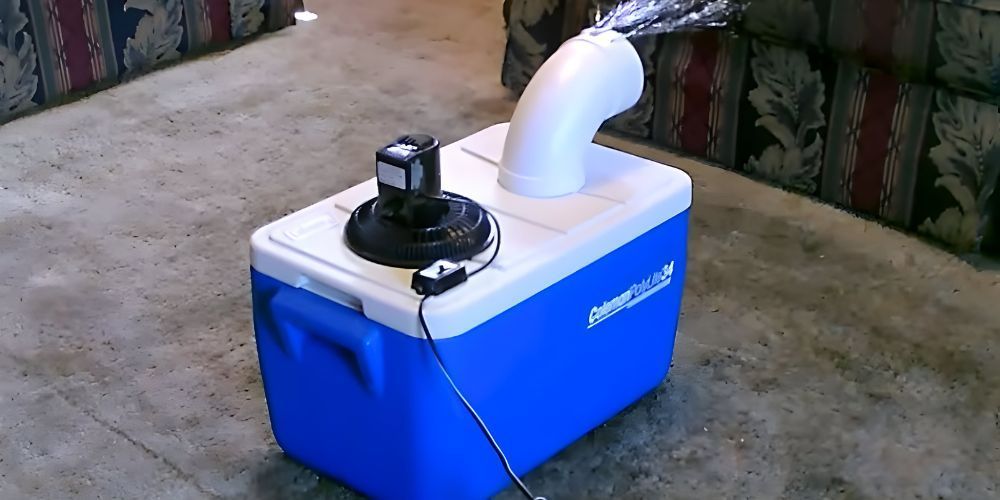
Now, you can carefully plug in the fan's cord. Make sure the fan is working smoothly by turning it on. Adjust the fan's angle while it is running to improve airflow. Use zip ties or adhesive clips to fasten the fan's power wire.
Section 4: Tips for Optimal Performance
For this part, get a few jugs of water and freeze them instead of using bagged ice for your AC. The water jugs may be repeatedly frozen and are a mess-free alternative. Also, remember to keep the portable AC away from any heat source so that its temperature sensor won't be thrown off. Avoid placing items or furniture that obstruct the fan or the vents and prevent airflow.
Section 5: Safety and Maintenance
When using a homemade air conditioner, prioritize safety above all else. Ensure that the AC unit is positioned well away from any water sources to minimize the risk of the fan short-circuiting.
Section 6: Exploring Further Customization
One of the most remarkable features of a portable air conditioner is its versatility, allowing you to adapt it to the specific requirements of your space. With the right equipment and a bit of ingenuity, you can create a customized home-made air conditioner that suits your needs, whether it's for your home, workplace, camping site, or beyond.
As you can see, making your own portable AC unit is quite simple and even leaves some room for modifications as needed. Plus, it makes the perfect AC for your garage, home office, workshop, or wherever you need some extra cooling and ventilation. However, if you need a major fix for your HVAC system or an entirely new setup, call the experts at Rizzo HVAC. And remember to stay safe and to stay cool.
Related Post:
Why is My A/C not Blowing Cold Air?
